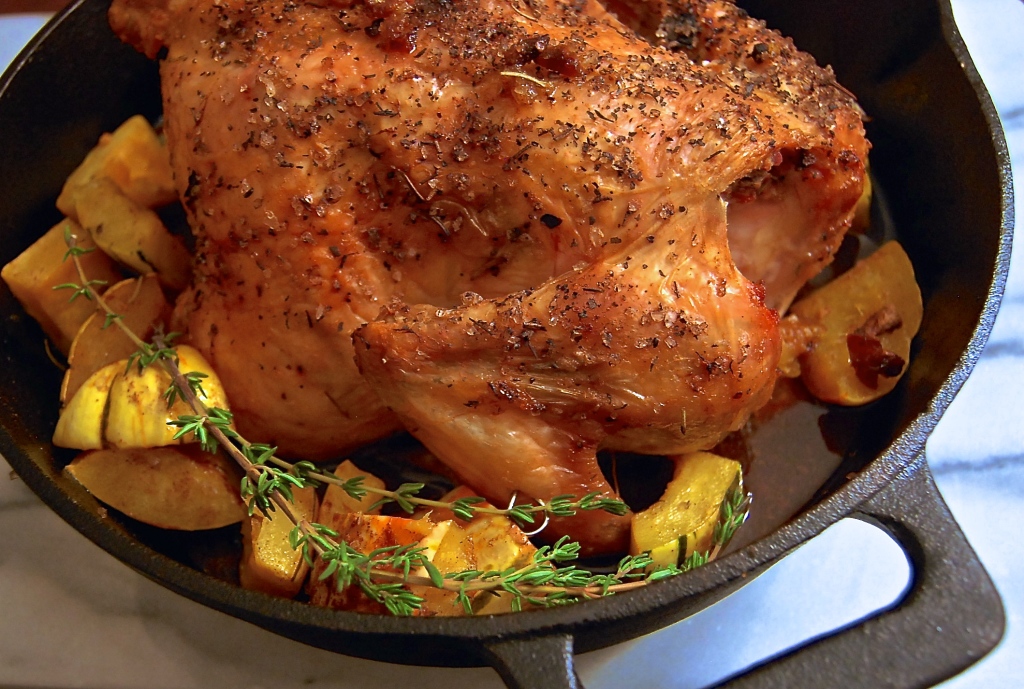
Perfect Fall Roast Chicken
Prep time
Cook time
Total time
Inspired by Chef Thomas Keller, from the "Bouchon" cookbook. This roast chicken is great because all you have to do is stuff it, truss it (pin the legs down so it cooks evenly) and then pop it in the oven. No braising, no turning, and it ends up with perfect, crispy skin.
Dana: Dana
Ingredients
- 1 whole roasting chicken, 3-4 lbs
- 1 small honeycrisp apple, cored and chopped
- 1 small onion, chopped
- 1 Tbsp poultry seasoning (or chopped herbs from 2 sages leaves, 1 sprig thyme and rosemary)
- 1 tsp coconut oil, ghee or grass-fed butter
- sea salt and black pepper**
Directions
- Preheat the oven to 450F.
- Get out your chicken and remove the giblets (anything that’s stuffed inside). Pat it dry very well with paper towels, inside and out. The drier it is, the more crispy skin you’ll have!
- Combine your apple, onion, and herb blend (or poultry seasoning) with 1 tsp coarse sea salt and ½ tsp pepper. Stuff it in the chicken cavity (the inside, duh.)
- Let’s get ready to truss the chicken. Trussing means you’re tying down or pinning the legs and wings close to the bird so it stays juicy and cooks evenly. I used 4 little metal skewers, but you could also use twine. (link below) Using the metal skewers, close the chicken cavity at the back (pin the skin together as tightly as possible) so the stuffing doesn’t fall out.
- Then pin the wings down to the breast by sticking a skewer through each of them to the center of the bird. You can do the same with the thighs (I ran out of skewers, so I skipped this step. It’ll still turn out just fine.)
- Salt both sides of the chicken (using about 1 tablespoon) by “raining salt all over the bird” from about a 6 inches-a foot above it. This will ensure it has an even coating.
- Season to taste with pepper. Then pat down the salt and pepper so it sticks to the skin.
- Prepare a large cast-iron skillet or roasting pan by smearing 1 tsp cooking fat on the bottom. This will ensure the bird doesn’t stick to your pan.
- Place the chicken in the pan breast side DOWN, backbone UP. This is different than most roast chicken recipes. I learned this in a cooking class - by roasting with the backbone up, all the good juices that are around those bones will run down the bird and make sure the breasts don’t dry out. No one wants dry, tasteless chicken boobs.
- When the oven is up to temperature, pop your bird in there. Roast it and leave it ALONE for about 50-60 minutes, until a meat thermometer stuck in the hip joint of the bird registers 165 degrees F.
- Take the bird out, baste it with a some of the pan juices, and rest it for 20 minutes on a cutting board. Whenever you grill or roast animal proteins, they need to rest for ⅓ of the cooking time so all the juices can spread out evenly. If you cut into it too soon, you’ll lose all those delicious juices inside!
Notes
I served mine with homemade apple butter, but dijon mustard is great too if you want to go the savory route.
**AIP: omit pepper
**AIP: omit pepper
Recipe by Dana Monsees Nutrition at https://www.realfoodwithdana.com/perfect-fall-roast-chicken/